Hey, their guys hope you are keeping well, in this tutorial we are going to look at how to implement laravel multiple authentications using laravel jetstream.
Laravel Jetstream is a beautifully designed application starter kit for Laravel and provides the perfect starting point for your next Laravel application.
Jetstream provides the implementation for your application’s login, registration, email verification, two-factor authentication, session management, API via Laravel Sanctum, and optional team management features.
Jetstream is designed using Tailwind CSS and offers your choice of Livewire or Inertia scaffolding.
In this application, we will have an authentication both for admin and users. In other words, an admin can log in to his or her dashboard as well as the user.
So let’s get started we will start by updating the Authentication guards, User Providers and Resetting Passwords in the
config/auth.phpStep 1: Update the config/auth.php with the below code
Authentication Guards:
'guards' => [
    'web' => [
      'driver' => 'session',
      'provider' => 'users',
],

'api' => [
     'driver' => 'token',
     'provider' => 'users',
     'hash' => false,
],

'admin' => [
     'driver' => 'session',
     'provider' => 'admins',
],

'admin-api' => [
    'driver' => 'token',
    'provider' => 'admins',
    'hash' => false,
   ],
],
User Providers:
'providers' => [
   'users' => [
      'driver' => 'eloquent',
       'model' => App\Models\User::class,
],
'admins' => [
    'driver' => 'eloquent',
    'model' => App\Models\Admin::class,
 ],
],
Resetting Passwords:
'passwords' => [
    'users' => [
        'provider' => 'users',
        'table' => 'password_resets',
        'expire' => 60,
],
'admins' => [
    'provider' => 'users',
    'table' => 'password_resets',
    'expire' => 60,
   ],
],
Step 2: Adding Admin Auth Routes.
Here we’re going to create admin routes that will facilitate the admin side. In other words, these routes will take us to the admin dashboard through the login logout functionality, etc.
Now create a file
admin.phpfrom the routes folder i.e routes/admin.php. This file is going to handle the admin functionality the routing for the admin side in short.
In the admin.phpadd the below routes:
Route::group(['prefix' => 'admin'], function () {

   Route::get('login', ''App\Http\Controllers\Admin\LoginController@showLoginForm')->name('admin.login');
   Route::post('login', ''App\Http\Controllers\Admin\LoginController@login')->name('admin.login.post');
   Route::get('logout', ''App\Http\Controllers\Admin\LoginController@logout')->name('admin.logout');

   Route::get('/', function () {
      return view('admin.dashboard.index');
   });

});
You will need to call this file admin.phpin the routes/web.php for it to work. So in routes/web.php update it with the following code
use Illuminate\Support\Facades\Route;

/*
|--------------------------------------------------------------------------
| Web Routes
|--------------------------------------------------------------------------
|
| Here is where you can register web routes for your application. These
| routes are loaded by the RouteServiceProvider within a group which
| contains the "web" middleware group. Now create something great!
|
*/

Route::get('/', function () {
   return view('welcome');
});

Route::middleware(['auth:sanctum', 'verified'])->get('/dashboard', function () {
   return view('dashboard');
})->name('dashboard');

require 'admin.php';
Step 3: Creating Admin Auth Controller
In this part, we’re creating the admin LoginController that will enable us to log in to the admin dashboard. In simple words, it enables the admin to login in log out and as well it shows the login form for the admin user.
Run the following command
php artisan make:controller Admin\\LoginControllerThis means that you will have a folder Admin with the above controller. Add the code below
namespace App\Http\Controllers\Admin;

use Illuminate\Http\Request;
use Illuminate\Support\Arr;
use App\Http\Controllers\Controller;
use Illuminate\Auth\AuthenticationException;
use Illuminate\Foundation\Auth\AuthenticatesUsers;

class LoginController extends Controller
{
    use AuthenticatesUsers;

   /**
   * Where to redirect admins after login.
   *
   * @var string
   */
   protected $redirectTo = '/admin';

   /**
   * Create a new controller instance.
   *
   * @return void
   */
   public function __construct()
   {
   $this->middleware('guest:admin')->except('logout');
   }

   /**
   * @return \Illuminate\Contracts\View\Factory|\Illuminate\View\View
   */
   public function showLoginForm()
   {
   return view('admin.auth.login');
   }
}
Step 4: Creating Admin Login Page.
As we have created the Admin LoginController. We now need to create the login page for the admin to login in to. In the resources folder under views make two folders i.e admin/auth in other words like this
resources/views/admin/authNow make the login.blade.php below the auth folder i.e
resources/views/admin/auth/login.blade.phpor you can use this command
touch resources/views/admin/auth/login.blade.phpMake sure you first create the two folders admin/auth or the above command will not work.
Once this is done you can look for a template of your choice for the admin show login form. For my case, I will go with the laravel jetstream login page template for the admin side.
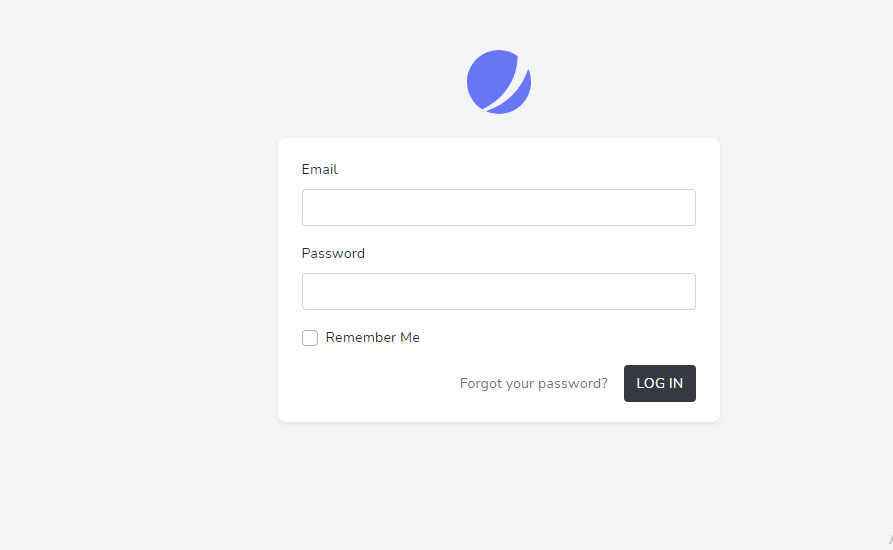
Since am using the jetstream template I will need to update the code for this particular login blade. All I need to update is the route to go to
admin.login.postand here’s the code…
<x-guest-layout>
    <x-jet-authentication-card>
        <x-slot name="logo">
            <x-jet-authentication-card-logo />
        </x-slot>

        <div class="card-body">

            <x-jet-validation-errors class="mb-3 rounded-0" />

            @if (session('status'))
                <div class="alert alert-success mb-3 rounded-0" role="alert">
                    {{ session('status') }}
                </div>
            @endif

            <form method="POST" action="{{ route('admin.login.post') }}">
                @csrf
                <div class="form-group">
                    <x-jet-label value="{{ __('Email') }}" />

                    <x-jet-input class="{{ $errors->has('email') ? 'is-invalid' : '' }}" type="email"
                                 name="email" :value="old('email')" required />
                    <x-jet-input-error for="email"></x-jet-input-error>
                </div>

                <div class="form-group">
                    <x-jet-label value="{{ __('Password') }}" />

                    <x-jet-input class="form-control{{ $errors->has('password') ? ' is-invalid' : '' }}" type="password"
                                 name="password" required autocomplete="current-password" />
                    <x-jet-input-error for="password"></x-jet-input-error>
                </div>

                <div class="form-group">
                    <div class="custom-control custom-checkbox">
                        <x-jet-checkbox id="remember_me" name="remember" />
                        <label class="custom-control-label" for="remember_me">
                            {{ __('Remember Me') }}
                        </label>
                    </div>
                </div>

                <div class="mb-0">
                    <div class="d-flex justify-content-end align-items-baseline">
                        @if (Route::has('password.request'))
                            <a class="text-muted mr-3" href="{{ route('password.request') }}">
                                {{ __('Forgot your password?') }}
                            </a>
                        @endif

                        <x-jet-button>
                            {{ __('Log in') }}
                        </x-jet-button>
                    </div>
                </div>
            </form>
        </div>
    </x-jet-authentication-card>
</x-guest-layout>
Step 5: Adding Admin Login Functionality.
In this part will we need to add the admin login functionality, I mean the authentication for admin. In other words, the admin can be logged in with his or her email and password. So what you have to do is to update the LoginController.php with the following code.
namespace App\Http\Controllers\Admin;

use Illuminate\Http\Request;
use Illuminate\Support\Arr;
use App\Http\Controllers\Controller;
use Illuminate\Auth\AuthenticationException;
use Illuminate\Foundation\Auth\AuthenticatesUsers;

class LoginController extends Controller
{
    use AuthenticatesUsers;

    /**
     * Where to redirect admins after login.
     *
     * @var string
     */
    protected $redirectTo = '/admin';

    /**
     * Create a new controller instance.
     *
     * @return void
     */
    public function __construct()
    {
        $this->middleware('guest:admin')->except('logout');
    }

    /**
     * @return \Illuminate\Contracts\View\Factory|\Illuminate\View\View
     */
    public function showLoginForm()
    {
        return view('admin.auth.login');
    }

        /**
     * @param Request $request
     * @return \Illuminate\Http\RedirectResponse
     * @throws \Illuminate\Validation\ValidationException
     */
    public function login(Request $request)
    {
        $this->validate($request, [
            'email'   => 'required|email',
            'password' => 'required|min:6'
        ]);
        if (Auth::guard('admin')->attempt([
            'email' => $request->email,
            'password' => $request->password
        ], $request->get('remember'))) {
            return redirect()->intended(route('admin.dashboard'));
        }
        return back()->withInput($request->only('email', 'remember'));
    }
We also need to ensure that the admin can log out once he or she is logged in. So let’s also update the LoginController.php with the following code as well.
namespace App\Http\Controllers\Admin;

use Illuminate\Http\Request;
use Illuminate\Support\Arr;
use App\Http\Controllers\Controller;
use Illuminate\Auth\AuthenticationException;
use Illuminate\Foundation\Auth\AuthenticatesUsers;

class LoginController extends Controller
{
    use AuthenticatesUsers;

    /**
     * Where to redirect admins after login.
     *
     * @var string
     */
    protected $redirectTo = '/admin';

    /**
     * Create a new controller instance.
     *
     * @return void
     */
    public function __construct()
    {
        $this->middleware('guest:admin')->except('logout');
    }

    /**
     * @return \Illuminate\Contracts\View\Factory|\Illuminate\View\View
     */
    public function showLoginForm()
    {
        return view('admin.auth.login');
    }

        /**
     * @param Request $request
     * @return \Illuminate\Http\RedirectResponse
     * @throws \Illuminate\Validation\ValidationException
     */
    public function login(Request $request)
    {
        $this->validate($request, [
            'email'   => 'required|email',
            'password' => 'required|min:6'
        ]);
        if (Auth::guard('admin')->attempt([
            'email' => $request->email,
            'password' => $request->password
        ], $request->get('remember'))) {
            return redirect()->intended(route('admin.dashboard'));
        }
        return back()->withInput($request->only('email', 'remember'));
    }

        /**
     * @param Request $request
     * @return \Illuminate\Contracts\View\Factory|\Illuminate\View\View
     */
    public function logout(Request $request)
    {
        Auth::guard('admin')->logout();
        $request->session()->invalidate();
        return redirect()->route('admin.login');
    }
}
Step 6: Redirecting Authenticated Admin To Dashboard Page.
This will authenticate the admin and ensure that he or she is the right person logged in or else if not the person will be returned to the home page or the default page. Locate the
app/Http/Middleware/Redirecifauthenticated.phpand update it with the following code.
/**
* Handle an incoming request.
*
* @param \Illuminate\Http\Request $request
* @param \Closure $next
* @param string|null $guard
* @return mixed
*/
public function handle($request, Closure $next, $guard = null)
{
    switch($guard){
    case 'admin':
    if (Auth::guard($guard)->check()) {
      return redirect('/admin');
    }
    break;
    default:
    if (Auth::guard($guard)->check()) {
      return redirect('/');
    }
    break;
    }
    return $next($request);
}
If not sure you can check the code in GitHub.
Step 7: Redirecting Unauthenticated Admin To Login Page.
We will also check to ensure the ones that are not admins are redirected to the login page.
Locate
app/Exceptions/Handler.phpand update it with the following code. Add at the bottom of the class.
/**
* @param \Illuminate\Http\Request $request
* @param AuthenticationException $exception
* @return \Illuminate\Http\JsonResponse|\Illuminate\Http\RedirectResponse|\Symfony\Component\HttpFoundation\Response
*/
protected function unauthenticated($request, AuthenticationException $exception)
{
   if ($request->expectsJson()) {
      return response()->json(['message' => $exception->getMessage()], 401);
}
   $guard = Arr::get($exception->guards(), 0);
   switch($guard){
   case 'admin':
   $login = 'admin.login';
   break;
   default:
   $login = 'login';
   break;
}
    return redirect()->guest(route($login));
}
Step 8: Update the admin.php
Since we’re almost done 🙂 let’s update the admin.php with the following code
Route::group(['middleware' => ['auth:admin']], function () {

    Route::get('/', function () {
        return view('admin.dashboard.index');
    })->name('admin.dashboard');

});
What we are doing here is that we are authenticating the admin side by adding the middleware. This ensures the admins are always authenticated.
Step 9: Create Admins Table
We, Will, need an admin table for it to record the admins who are logged in. This has to be recorded in the database. So create an admin table and update it with the following code.
php artisan make:migration create_admins_table
use Illuminate\Database\Migrations\Migration;
use Illuminate\Database\Schema\Blueprint;
use Illuminate\Support\Facades\Schema;

class CreateAdminsTable extends Migration
{
    /**
    * Run the migrations.
    *
    * @return void
    */
  public function up()
  {
     Schema::create('admins', function (Blueprint $table) {
     $table->bigIncrements('id');
     $table->string('name');
     $table->string('email')->unique();
     $table->timestamp('email_verified_at')->nullable();
     $table->string('password');
     $table->rememberToken();
     $table->timestamps();
   });
}

/**
* Reverse the migrations.
*
* @return void
*/
public function down()
{
   Schema::dropIfExists('admins');
  }
}
We also need to have a default admin with an email and password. This is for testing purposes. So what will need is a seeder class that has an admin email and a password. Create
AdminsTableSeeder.phpand update it with the following code.
Admin::create([
           'name' => $faker->name,
           'email' => 'admin@gmail.com',
           'password' => bcrypt('password'),
       ]);
then in the
DatabaseTableSeeder.php
call the AdminTableSeeder::class like this

$this->call(AdminsTableSeeder::class);
Step 10: Update the Model Admin.php
namespace App\Models;

use Illuminate\Notifications\Notifiable;
use Illuminate\Contracts\Auth\MustVerifyEmail;
use Illuminate\Foundation\Auth\User as Authenticatable;

class Admin extends Authenticatable
{
    use Notifiable;

    /**
    * The attributes that are mass assignable.
    *
    * @var array
    */
    protected $fillable = [
    'name', 'email', 'password',
    ];

    /**
    * The attributes that should be hidden for arrays.
    *
    * @var array
    */
    protected $hidden = [
   'password', 'remember_token',
   ];

   /**
   * The attributes that should be cast to native types.
   *
   * @var array
   */
   protected $casts = [
   'email_verified_at' => 'datetime',
   ];
   }
So am are am calling the name, email, and password in the protected fillable nothing fancy.
Step 11: Make an app.blade.php
Make sure you have an app blade that extends the admin functionality. Create an app.blade.php under the
resources/views/admin/app.blade.phpand update it with the following code
<!DOCTYPE html>
<html lang="en">
<head>
    <title>@yield('title') - {{ config('app.name') }}</title>
    <meta charset="utf-8" />
    <meta http-equiv="X-UA-Compatible" content="IE=edge" />
    <meta name="viewport" content="width=device-width, initial-scale=1" />
    <meta name="csrf-token" content="{{ csrf_token() }}">

</head>
<body class="app sidebar-mini rtl">

    <main class="app-content" id="app">
       @yield('content')
   </main>

</body>
</html>
for this one, you can tailor it according to the version of your laravel.
Step 12: Create a view for the admin dashboard
Now we already have a dashboard for users i.e the default laravel jetstream dashboard. Here also we need to have a dashboard view for the admins.
Create an index.blade.php under the resources/views/admin/dashboard/index.blade.php. Remember you can also use
the touch command i.e
touch resources/views/admin/dashboard/index.blade.phponce that is done you can use any admin template of your choice.
I recommend the vali admin you can check it on GitHub and download it. Here’s the link to the GitHub
https://github.com/pratikborsadiya/vali-admin/blob/master/docs/dashboard.html or the website
https://pratikborsadiya.in/vali-admin/
What you can do here you can add the routes such as the logout functionality.
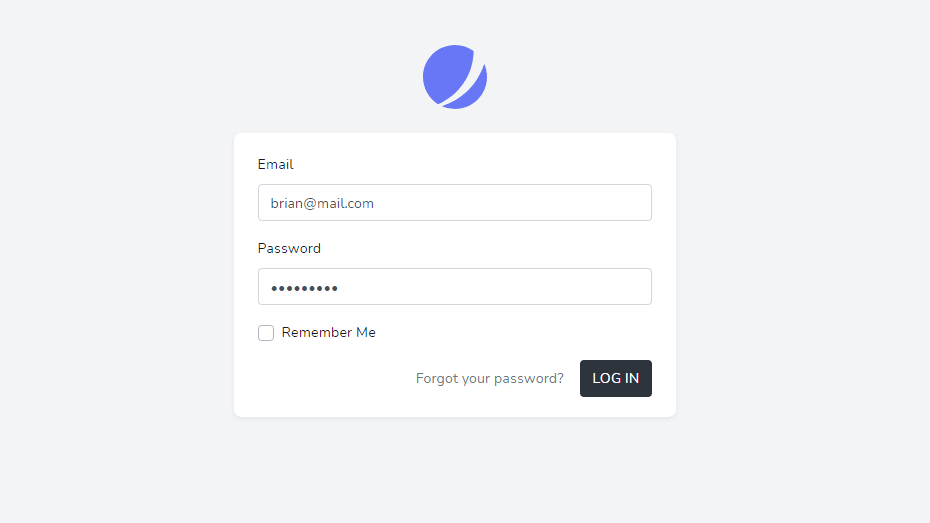
This is the result you should expect for a normal user. Use the jetstream login blade to log in with your registered credentials
destination after login

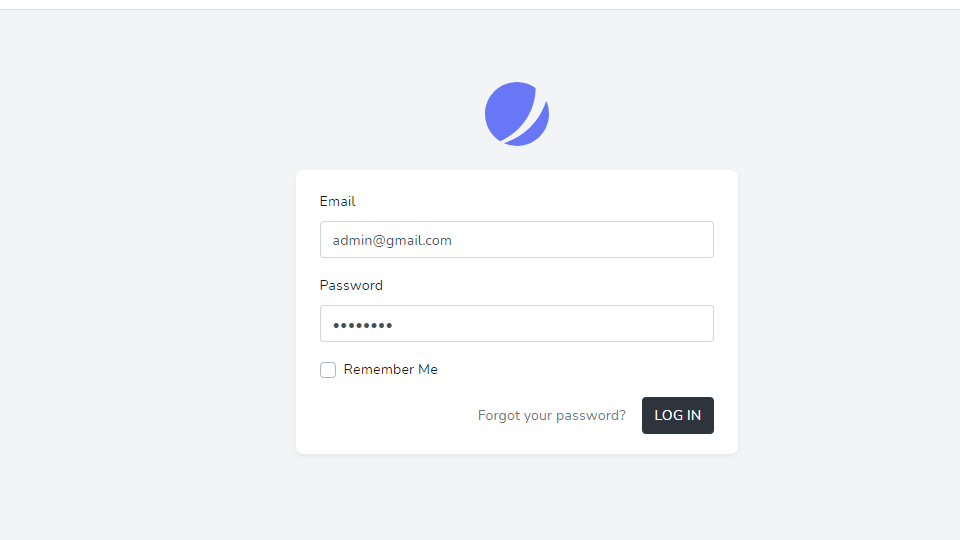
for the admin user go to http://127.0.0.1:8000/admin and login with the credentials from the AdminTableSeederclass.php or from your admin side in the database.
and the final destination should be this
You can check the full code on GitHub and as well watch the tutorial on my YouTube channel where you can subscribe also.
Vous ne faites pas de modifications dans la table “sessions”. L’une des colonnes s’appelle “user_id”. Quelle sera la valeur quand il s’agit d’un “admin” ?
The “sessions” table is being used to track the current sessions of all users, regardless of their role, then the value of the “user_id” column will be the ID of the administrator user when they are logged in. This is because the “user_id” column is used to identify the user who is currently logged in.
For example, if an administrator user logs in with the username “admin” and the password “password”, the value of the “user_id” column will be 1. This is because the ID of the administrator user in the “users” table is 1.
Merci.
Bonjour,
J’ai un autre problème.
A la “step 2” vous dites qu’il faut faire un fichier “admin.php”. Or, je ne trouve pas ce fichier dans votre code que j’ai téléchargé sur Github.
De plus, quand j’essaie de le faire, j’ai une erreur car l’espace de noms n’est pas indiqué.
Have you checked the tutorial on youtube? Coz I explain very well on how to create the admin.php file.
By default we have User.php so you need to create Admin.php.
Github code for this tutorial https://github.com/BrianMwengi/Laravel-Jetstream-Multi-Auth
https://youtu.be/Di993hgcs0M