In this post, I’m going to show you step-by-step how to set up a SMTP with Cpanel hosting.
I normally see Laravel devs struggling with this! or they end up configuring the SMTP settings the wrong way. So, let's learn how to do it the correct way.
Step 1: Creating your Business Email in cPanel
The first thing you need to do is get your professional email address ready.
Log in to your cPanel dashboard.
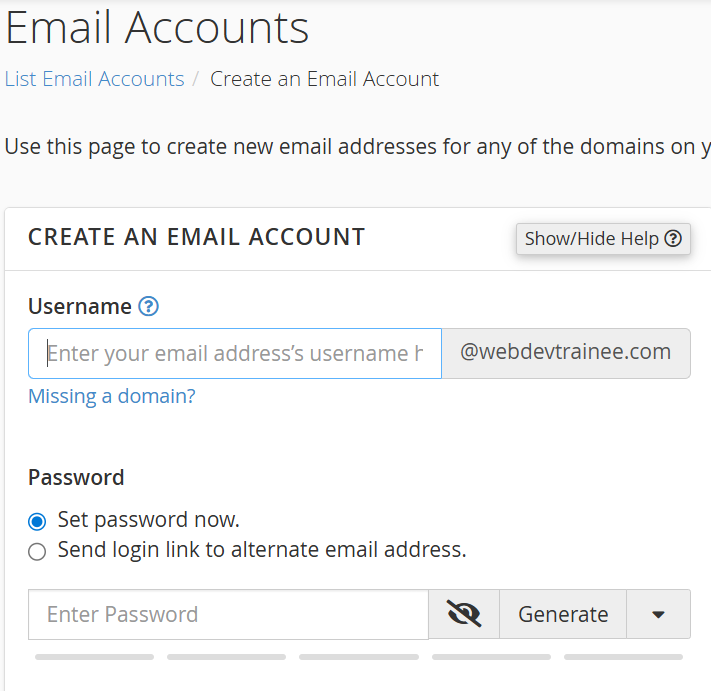
Search for "Email Accounts" and click on it.

Click the + Create button on the right side.
Fill in the details:
Domain: Select the domain you're working with.
Username: Type in something like
info,contact, orsupport.Password: Generate or type a strong password (make sure to save this!).
Click Create at the bottom.
All right, now that our email is created, we need the specific settings to tell Laravel how to use it.
Step 2: Retrieving SMTP Configuration
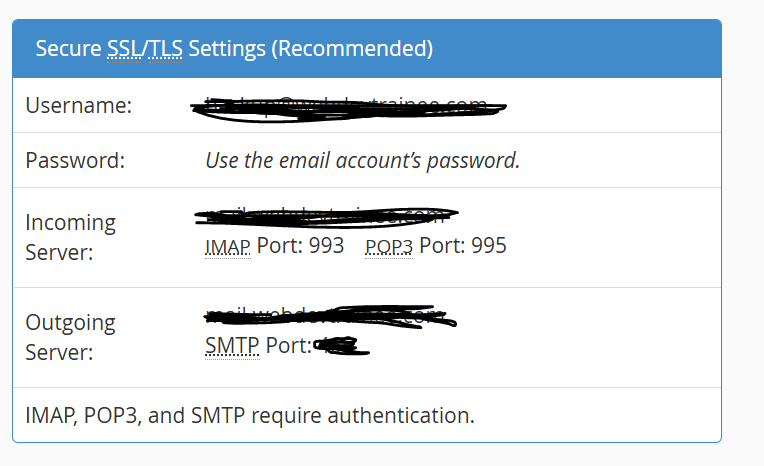
In the Email Accounts list, find your new email and click Connect Devices

Look for the "Mail Client Manual Settings" section.
You specifically need the Secure SSL/TLS Settings (Recommended):
Username: your-email@yourdomain.com
Password: (The one you just created)
Incoming Server:
mail.yourdomain.comOutgoing Server:
mail.yourdomain.comSMTP Port:
465(for SSL) or587(for TLS).
Step 3: Configuring the Laravel .env File
Now, switch over to your Laravel project. Open your .env file located in the root directory. This is where you’ll swap out the default settings for your cPanel credentials.

Pro Tip: If you use port
465, setMAIL_ENCRYPTIONtossl. If you use587, set it totls.Make sure
MAIL_FROM_ADDRESSmatches yourMAIL_USERNAMEso your emails don't end up in the spam folder.
Step 4: Clearing the Configuration Cache
After saving the .env file, your changes might not take effect immediately because Laravel caches the config. You need to run this command in your terminal:
php artisan config:cache
"Once you see 'Configuration cache cleared!', you are good to go. Your Laravel app is now connected to your CPanel SMTP server."
"I hope this post helped you out! If it did, remember to subscribe to the newsletter, share this post with your friends, and comment down below if you have any issues. I'll see you in the next tutorial. All right guys, bye!"
YouTube URL: https://youtu.be/IrHRZkguVzk